
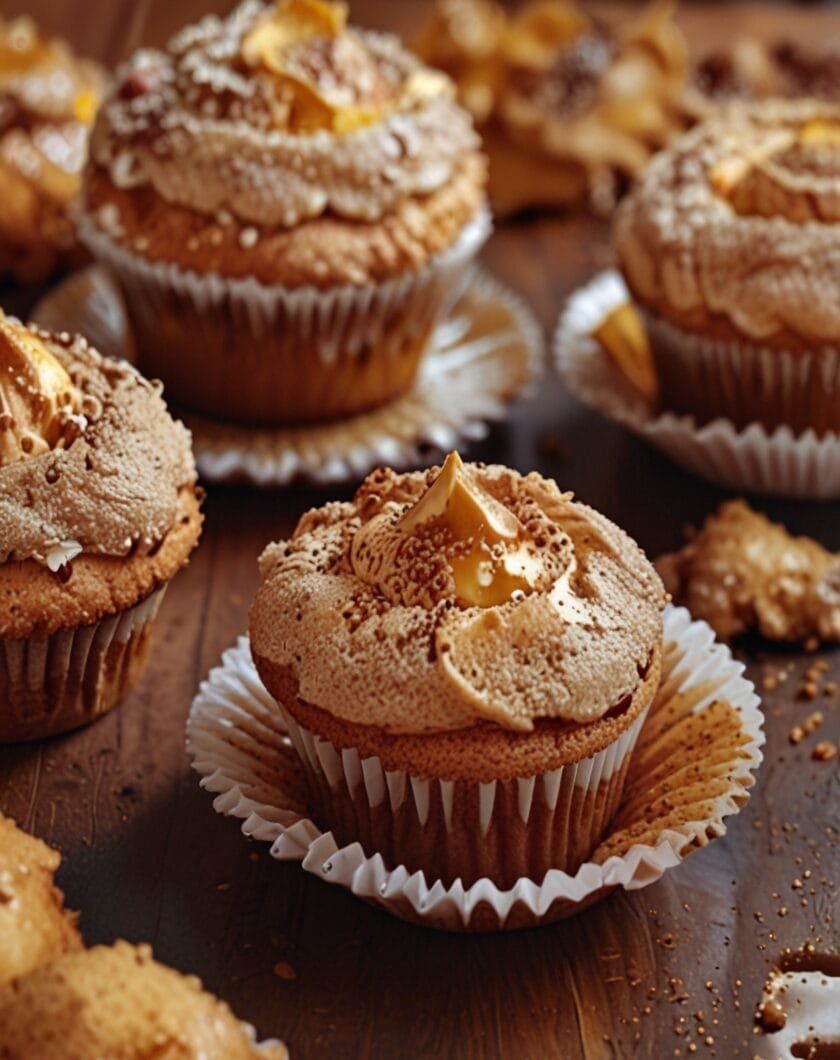
Easy Biscoff Swirl Cupcakes: A Simple Baking Guide
Biscoff swirl cupcakes are yummy treats that mix the special taste of Biscoff cookies with soft cupcakes. Biscoff, also known as speculoos, is a popular cookie with a warm, spiced, and caramel flavor that makes amazing desserts. In these homemade cupcakes, smooth Biscoff spread is swirled into the batter, giving each bite a delicious contrast of creamy and fluffy textures.
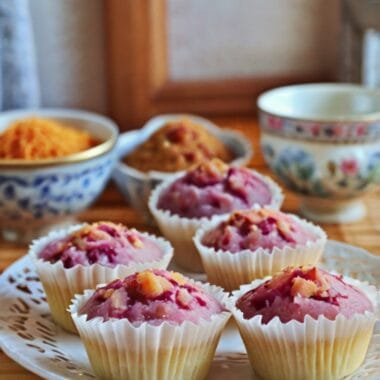
These easy cupcakes are loved for their great taste and feel. Every bite has a moist cupcake with a rich swirl of Biscoff, making everyone happy. The warm spices and caramel flavor of Biscoff are comforting and perfect for all ages. Biscoff swirl cupcakes look appealing and taste fantastic, making them ideal for birthday parties, gatherings, or just a sweet treat.
This simple guide will show you how to make your own Biscoff swirl cupcakes. You’ll learn easy steps to get that perfect Biscoff swirl and tips to make them look even better. Whether you’re new to baking or have baked a lot, this recipe is fun and easy, and your friends and family will love these tasty Biscoff flavored cupcakes. Get ready to enjoy a sweet baking adventure!
What You Need: Ingredients for Biscoff Cupcakes
To start making these yummy Biscoff swirl cupcakes, you need a few basic baking items. For the cupcake base, you’ll need: 1 ½ cups of all-purpose flour, 1 cup of granulated sugar, ½ cup of soft unsalted butter, and 2 large eggs. You’ll also need ½ cup of milk to make the cupcakes moist. Baking powder (1 ½ teaspoons) and vanilla extract (1 teaspoon) add flavor and help them rise.
The star ingredient is Biscoff spread, which gives the cupcakes their special caramel flavor. You’ll need about ¾ cup of Biscoff spread, usually found near peanut butter in stores. You can often find Biscoff spread and other ingredients conveniently online. Check out this link for Biscoff spread on Amazon: Biscoff Spread on Amazon You’ll also need a small handful of crushed Biscoff cookies (about 6-8) to create the lovely Biscoff swirl in the batter.
If you have any food allergies, there are easy swaps. For a gluten-free version, use gluten-free all-purpose flour. For a dairy-free option, use coconut oil instead of butter and any plant-based milk. If you can’t eat eggs, try using flaxseed meal mixed with water or a commercial egg replacer to keep the batter right.
Getting all your ingredients ready means you can easily make these Biscoff swirl cupcakes your own. You can choose organic sugar or try different nut-free butter spreads to fit your needs. Make sure you have everything ready to bake a delicious and satisfying treat.
Must-Have Baking Tools for Perfect Cupcakes
Having the right baking tools is super important for making great Biscoff swirl cupcakes. Good tools make baking easier and more fun. Here’s what you’ll need:
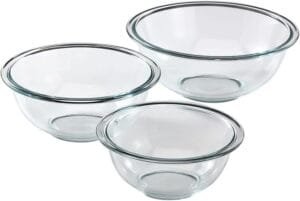
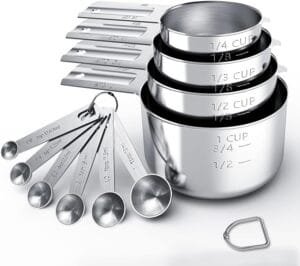
First, get some good mixing bowls in different sizes. A big one is useful for mixing all the wet and dry ingredients together. Stainless steel or glass bowls are great because they last long and are easy to clean. You’ll also need measuring cups and spoons to make sure you use the right amount of each ingredient, which helps your cupcakes turn out perfectly flavored and with the right texture.
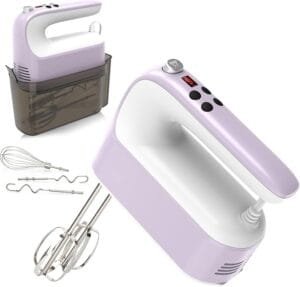
An electric mixer is a big help. Whether it’s a hand mixer or a stand mixer, it saves you time and makes the batter light and fluffy. If you like mixing by hand, a whisk works well, especially for smaller batches.
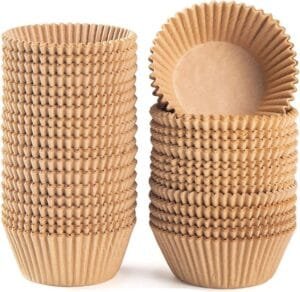
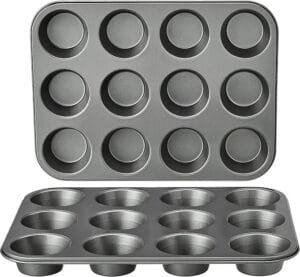
Don’t forget a good cupcake tray to hold your cupcake liners while they bake. Silicone or metal trays are both good, and non-stick options make it easy to take out your baked cupcakes. Using cupcake liners makes your cupcakes look nice and stops them from sticking. You can find a variety of essential baking tools on Amazon to help you get started: Baking Tools on Amazon
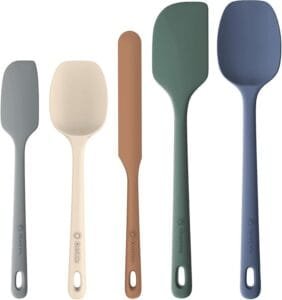
Finally, get some silicone spatulas to scrape the sides of your bowls and make sure all the batter gets mixed in. Pastry brushes can be used to add melted Biscoff spread on top. Having these tools ready will make your Biscoff swirl cupcake baking experience much better.
Step 1: Making the Cupcake Batter
To start making your delicious Biscoff swirl cupcakes, the first thing is to get the cupcake batter just right. This involves a few important steps that will help your cupcakes bake perfectly. First, gather all your cupcake ingredients: all-purpose flour, baking powder, baking soda, salt, unsalted butter, granulated sugar, eggs, vanilla extract, and milk. Make sure these are at room temperature for the best mixing.
In a medium bowl, mix together the dry ingredients: all-purpose flour, baking powder, baking soda, and salt. Whisk them well so that the baking powder and baking soda are spread evenly. This helps your cupcakes rise nicely and become light and fluffy.
Next, in a large bowl, beat together the softened butter and granulated sugar. Use an electric mixer on medium speed for about 3 to 4 minutes until the mixture is light and fluffy. This step adds air to the batter, making your cupcakes soft. Once it’s creamy, add the eggs one at a time, mixing well after each one. This stops the batter from separating and keeps it smooth.
After the eggs are mixed in, add the vanilla extract and mix again. Gently fold in the dry ingredients using a spatula, little by little, and alternate with the milk. This stops you from overmixing, which can make the cupcakes tough. Stir until just combined, and don’t worry about a few small lumps. The batter should be thick but easy to pour. Following these steps will make sure your cupcake batter is ready for the yummy Biscoff swirl!
Step 2: Adding the Delicious Biscoff Swirl
Now, let’s make the special Biscoff swirl that will make your cupcakes amazing. You’ll need some good quality Biscoff spread. This creamy, caramelized cookie spread is the key to turning simple cupcakes into a treat everyone will love. Start by measuring about half a cup of Biscoff spread. This should be enough to create a nice swirl in each cupcake.
Next, you need to melt the Biscoff spread so it’s easy to swirl. Put the measured spread in a microwave-safe bowl. Heat it in the microwave for 10-15 seconds at a time, stirring in between, until it’s smooth and pourable. You want it to be warm and liquid, like honey, but be careful not to heat it too much, as this can change its taste and texture.
Once the Biscoff spread is melted, it’s time to add it to your cupcake batter. After you’ve filled your cupcake liners with the vanilla batter, take a spoonful of the melted Biscoff spread and drizzle it on top of the batter in each liner. To make the swirl pattern, use a skewer or a toothpick to gently mix the Biscoff into the batter. The trick is to fold it in without mixing it completely, so you get beautiful swirls when they bake. Make sure to put about the same amount of spread in each cupcake for even flavor.
This swirling technique will make your Biscoff cupcakes look fantastic, and every bite will have that rich Biscoff flavor. This special part not only makes the cupcakes look great but also adds a wonderful taste that cookie butter fans will adore. After this step, your cupcakes are almost ready to be a truly irresistible treat!
Step 3: Baking Your Perfect Cupcakes
Baking cupcakes is a simple but important step in making delicious Biscoff swirl cupcakes. Before you start, make sure to preheat your oven to 350°F (175°C). This ensures the cupcakes rise properly and bake evenly. While the oven is heating, get your cupcake pan ready by putting cupcake liners in each spot. Liners make it easier to take the cupcakes out and help them keep their shape.
Next, fill each cupcake liner with the batter. It’s best to fill them about two-thirds full. This leaves enough room for the cupcakes to rise without spilling over. Be careful not to fill them too much, or they might bake unevenly. If you want even more Biscoff flavor, you can add a little swirl of Biscoff spread on top of the batter before baking.
Once the oven is ready and the liners are filled, put the pan in the center of the oven. Bake the cupcakes for about 18 to 20 minutes. Keep in mind that baking times can change depending on your oven and where you live. To check if they’re done, stick a toothpick into the center of a cupcake. If it comes out clean or with just a few crumbs, they’re ready. If it’s still wet, they need to bake a little longer.
After taking the cupcakes out of the oven, let them cool in the pan for about five minutes before moving them to a wire rack. This helps them not get soggy from steam and keeps them from falling apart. Following these steps will help you bake your Biscoff swirl cupcakes perfectly, ready for frosting and enjoying!
Cooling and Frosting Your Biscoff Treats
After baking your yummy Biscoff swirl cupcakes, it’s really important to let them cool down completely before you add any frosting. If you frost them while they’re still warm, the frosting will melt and won’t look as nice, and the taste might change too. To cool them right, take them out of the oven and let them sit in the pan for about 5-10 minutes. Then, move them to a wire rack to finish cooling completely, which usually takes another 30-40 minutes.
While the cupcakes are cooling, you can get your frosting ready. You have two great choices: you can use more Biscoff spread to really bring out that flavor, or you can make a classic buttercream frosting. If you choose Biscoff spread, gently warm it in the microwave for about 10 seconds to make it easier to spread. If you’d rather do buttercream, beat some soft butter with powdered sugar and a little milk until it’s smooth and creamy. To add a hint of Biscoff to your buttercream, you can mix in a couple of tablespoons of Biscoff spread.
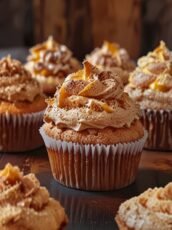
Once your cupcakes are cool and your frosting is ready, it’s time to decorate! For a professional look, use a piping bag with your favorite tip to add the frosting to the cupcakes. Just fill the bag with frosting, push it down to get rid of any air, and then start from the outside edge of the cupcake, swirling inwards to make a pretty design. For an extra touch, you can drizzle more melted Biscoff spread over the frosted cupcakes or sprinkle some crumbled Biscoff cookies on top.
Serving Suggestions and Storage Tips
To make your Biscoff Swirl Cupcakes even more enjoyable, try having them with a warm cup of coffee or tea. The rich, spiced flavor of Biscoff goes great with the strong taste of coffee, while a nice herbal tea can offer a refreshing contrast. If you’re having a party, arrange the cupcakes on a pretty tiered stand. You can also sprinkle extra Biscoff cookie crumbs or a little powdered sugar on top to make them look even better.
For an extra special treat, you could drizzle some caramel or add a swirl of whipped cream to each cupcake. Another idea is to mix a bit of cinnamon or nutmeg into the frosting to add a warm, spicy note that matches the Biscoff flavor. Decorating your cupcakes with fun toppings not only makes them look great but can also add a delicious extra layer of flavor that goes well with the Biscoff.
When you need to store your Biscoff Swirl Cupcakes, keeping them fresh is key. If you plan to eat them within a few days, put them in an airtight container at room temperature. If you want to keep them longer, you can freeze them. To do this, let the cupcakes cool completely, then put them in a freezer-safe container or wrap them tightly in plastic wrap and then foil. This will help prevent freezer burn, so they’ll still taste great even after a few weeks. When you’re ready to eat them, just let them thaw at room temperature or warm them in the microwave for a few seconds. Following these tips will help your Biscoff Swirl Cupcakes stay delicious for longer.
Conclusion and Final Thoughts on Your Biscoff Baking
We’ve reached the end of our sweet adventure making Biscoff Swirl Cupcakes, and we hope this easy guide has inspired you to bake these yummy treats yourself. Making these cupcakes not only brings together the amazing taste of Biscoff but also gives you the satisfying feeling of baking something special from scratch. Every step, from mixing the batter to swirling in the smooth Biscoff spread, lets you be creative in the kitchen.
Enjoying a Biscoff Swirl Cupcake is more than just eating something sweet; it’s a chance to share happiness with the people around you. Whether it’s a special day, a casual get-together, or just a treat for yourself, these cupcakes are sure to impress and satisfy. Invite your friends or family to bake with you – it’s a fun way to spend time together, and there’s nothing better than enjoying something delicious that you made together.
We really encourage you to bake these tasty Biscoff Swirl Cupcakes and tell us how it goes! Feel free to leave comments below about your baking successes, any changes you made to the recipe, or any fun things you added to your cupcakes. Our community loves to share tips and experiences. Whether your swirls are perfect or a little messy, the joy of baking is what matters. Happy baking! We can’t wait to hear about your cupcake adventures.
Frequently Asked Questions – Biscoff Swirl Cupcakes
What is Biscoff made of?
Biscoff is a caramelized biscuit spread made primarily from crushed speculoos cookies, sugar, and vegetable oils. It has a spiced, sweet flavor that’s perfect for baking.
Can I make these cupcakes without Biscoff spread?
You can substitute with another cookie butter or even Nutella, but the unique caramel-spice flavor of Biscoff will be missing.
How do I get the perfect Biscoff swirl?
Slightly warm the Biscoff spread so it’s easier to drizzle or swirl. Use a skewer or knife to gently swirl it into the cupcake batter or frosting for a marbled look.
Can I use Biscoff cookies in the recipe too?
Yes! Crushed Biscoff cookies make a great topping or crunchy layer inside the cupcakes for added texture.
Do these cupcakes need to be refrigerated?
If the cupcakes have a buttercream frosting, they can stay at room temperature for 1–2 days. For longer storage, refrigerate them in an airtight container and bring to room temp before serving.
Can I freeze Biscoff cupcakes?
Yes. Freeze unfrosted cupcakes for up to 2 months. Thaw, then frost and add the Biscoff swirl when ready to serve.
Can I make these gluten-free?
Yes, by using a gluten-free flour blend and checking that your cookie butter and cookies are gluten-free alternatives.
How long do they stay fresh?
They’re best within 2–3 days when stored in an airtight container. After that, the texture may start to dry out.
What type of frosting goes best with Biscoff cupcakes?
A Biscoff buttercream, cream cheese frosting, or even vanilla buttercream with Biscoff drizzle pairs wonderfully.
Can I make these into a cake instead of cupcakes?
Yes! Simply pour the batter into a lined cake tin and adjust the baking time accordingly—usually 25–35 minutes for an 8-inch round cake.
For more delicious recipes and baking tips, check out Sally’s Baking Addiction.
Biscoff Swirl Cupcakes
12
servings20
minutes20
minutes250
kcal40
minutesTea time just got better! If you love Biscoff, you’ll adore these soft, fluffy vanilla cupcakes swirled with rich Biscoff spread. Perfect with a cup of tea—sweet, comforting, and oh-so-delicious!
Ingredients
113 grams 113 grams unsalted butter, softened
150 grams 150 grams fine sugar
3 3 eggs
1 teaspoon 1 teaspoon vanilla extract
200 grams 200 grams cake flour
1/4 teaspoons 1/4 teaspoons salt
2 teaspoons 2 teaspoons baking powder
120 grams 120 grams Biscoff spread
120 ml 120 whole milk
Directions
- Using a electric whisk, cream butter and sugar until creamy and light. Beat in eggs, one at a time, until well combined.
- Beat in vanilla.
- Sift in flour, salt and baking powder. Use a spatula and fold in till a smooth batter is formed.
- Scoop some batter into small cup case and fill in a tsp of biscoff spread.
- Top with more batter until 3/4 full.
- Drizzle another tsp biscoff spread over.
- Lightly swirl into the batter using a toothpick.
- Bake in preheated oven at 180 deg cel for 20 mins.
Equipment
 Cupcake LinersBuy on Amazon
 Nonstick Round Muffin Baking PanBuy on Amazon
 Mixing BowlBuy on Amazon
 Digital Hand MixerBuy on Amazon
 Silicone Spatula SetBuy on Amazon
 Stainless Steel Measuring CupsBuy on Amazon
Recipe Video
Nutrition Facts
- Serving Size: 1g
- Total number of serves: 12
- Calories: 250kcal
- Fat: 13g
- Saturated Fat: 7g
- Trans Fat: 0g
- Polyunsaturated Fat: 1g
- Monounsaturated Fat: 4g
- Cholesterol: 50mg
- Sodium: 150mg
- Potassium: 100mg
- Carbohydrates: 30g
- Fiber: 1g
- Sugar: 18g
- Protein: 3g
- Vitamin A: 5IU
- Vitamin C: 0mg
- Calcium: 30mg
- Iron: 1mg
- Vitamin D: 0mg
- Vitamin E: 1mg
- Vitamin K: 0mg
- Thiamin: 0.1mg
- Riboflavin: 0.2mg
- Niacin: 0.5mg
- Vitamin B6: 0.1mg
- Vitamin B12: 0mg
- Folate: 50mg
- Biotin: 0mg
- Pantothenic Acid: 0.3mg
- Phosphorus: 50mg
- Iodine: 0mg
- Magnesium: 10mg
- Zinc: 0.5mg
- Selenium: 5mg
- Copper: 0.1mg
- Manganese: 0.1mg
- Chromium: 0mg
- Molybdenum: 0mg
- Chloride: 0mg
Did you make this recipe?
Tag @cambodiarecipe on Instagram and hashtag it
Like this recipe?
Follow us @cambodiarecipe on Pinterest
Did you make this recipe?
Follow us on Facebook
More recipe: Chinese Sweet Potato Coconut Huat Kueh


